A 3D game project using Procedural Animation in C++ using Unreal Engine 4
Writing a Third Person game in 3D letting the player control the character to do all kinds of actions requiring specific animations made with only two keyframes for each animation and a procedural technique in C++ using Unreal Engine 4.
The github repository of the Unreal Engine 4 with my modifications is accessible here: Fork of NVidia's Flex branch of Unreal Engine 4, if you cannot access UE4's repository, please follow the instructions from this link: UE4 on github
The github repository of the project used with my modified UE4 version is accessible here: Move Project
- Control a character animated using Procedural Animation able to:
- Done:
- face towards its velocity
- tilt into its acceleration
- damp its capsule collision when landing
- To do:
- walk
- run
- jump
- crouch
- run along walls
- run vertically on walls
- kick
- punch
- fall on ground
- slide on slopes
- other stuff
I started this project by watching/reading lots of documentations/reasearch papers/talks about procedural animation, which took me about a month until I knew exactly what I wanted to do and how to do it.
What people call procedural animation can mean different things:
- First, a skeleton controlled by an Artificial Intelligence using a trial and error system with a Neural Network to learn how to walk, run, etc. without falling. People have been working on this for a long time (the oldest paper I read about this was from 1993).
- Second, bones can have some defined constraints while we use Inverse Kinematics in order to replace the rest of the bones according to these constraints.
- Third, animation projected in the near future in order to predict if we will need to move some specific bones to some specific areas in order to avoid wrong poses (e.g. stepping over an object without clipping through it).
- Fourth, using only two keyframes to describe a movement and interpolating between angle's joints in order to transition from one pose to the other, also called blending, and usually used to create intermediate animations (e.g. Walk and Run).
This project is focusing on the fourth meaning of Procedural Animation, the second and third meanings will surely be implemented/used in the future, but the first meaning using AI learning won't be implemented nor explored here.
I did a first prototype of running using blueprint.
I then worked on a second prototype using only/mostly C++, for this I had to understand UE4's architecture of movement to be able to:
- orient the character based on its velocity
- tilt the character into its acceleration
- make the character react like a spring when landing
I was then planning to code myself a system to blend between poses as I though it didn't exist in UE4 in october 2017 when I was prototyping with blueprint. In fact I was on a wrong branch of FleX (I'm using FleX for the elements bending project) which last commit was in september 2016 and UE4 version was 4.12. But when I decided to fork the source code (not just pull it as you're only authorized to publish it by forking it) I noticed there was a more recent branch of FleX: Flex-4.17.1 using UE4 4.17.1 version. And so while writing these lines (January 2018) I just noticed they did a pose blending system in UE4 version 4.14 which was released in January 2017 and integrated with FleX only in March 2017. So for now I have to test there system and see if it fits my needs.
To understand what and why I made those modifications we first need to understand UE4's movement code architecture. Here is a UML diagram of the main classes used by characters:
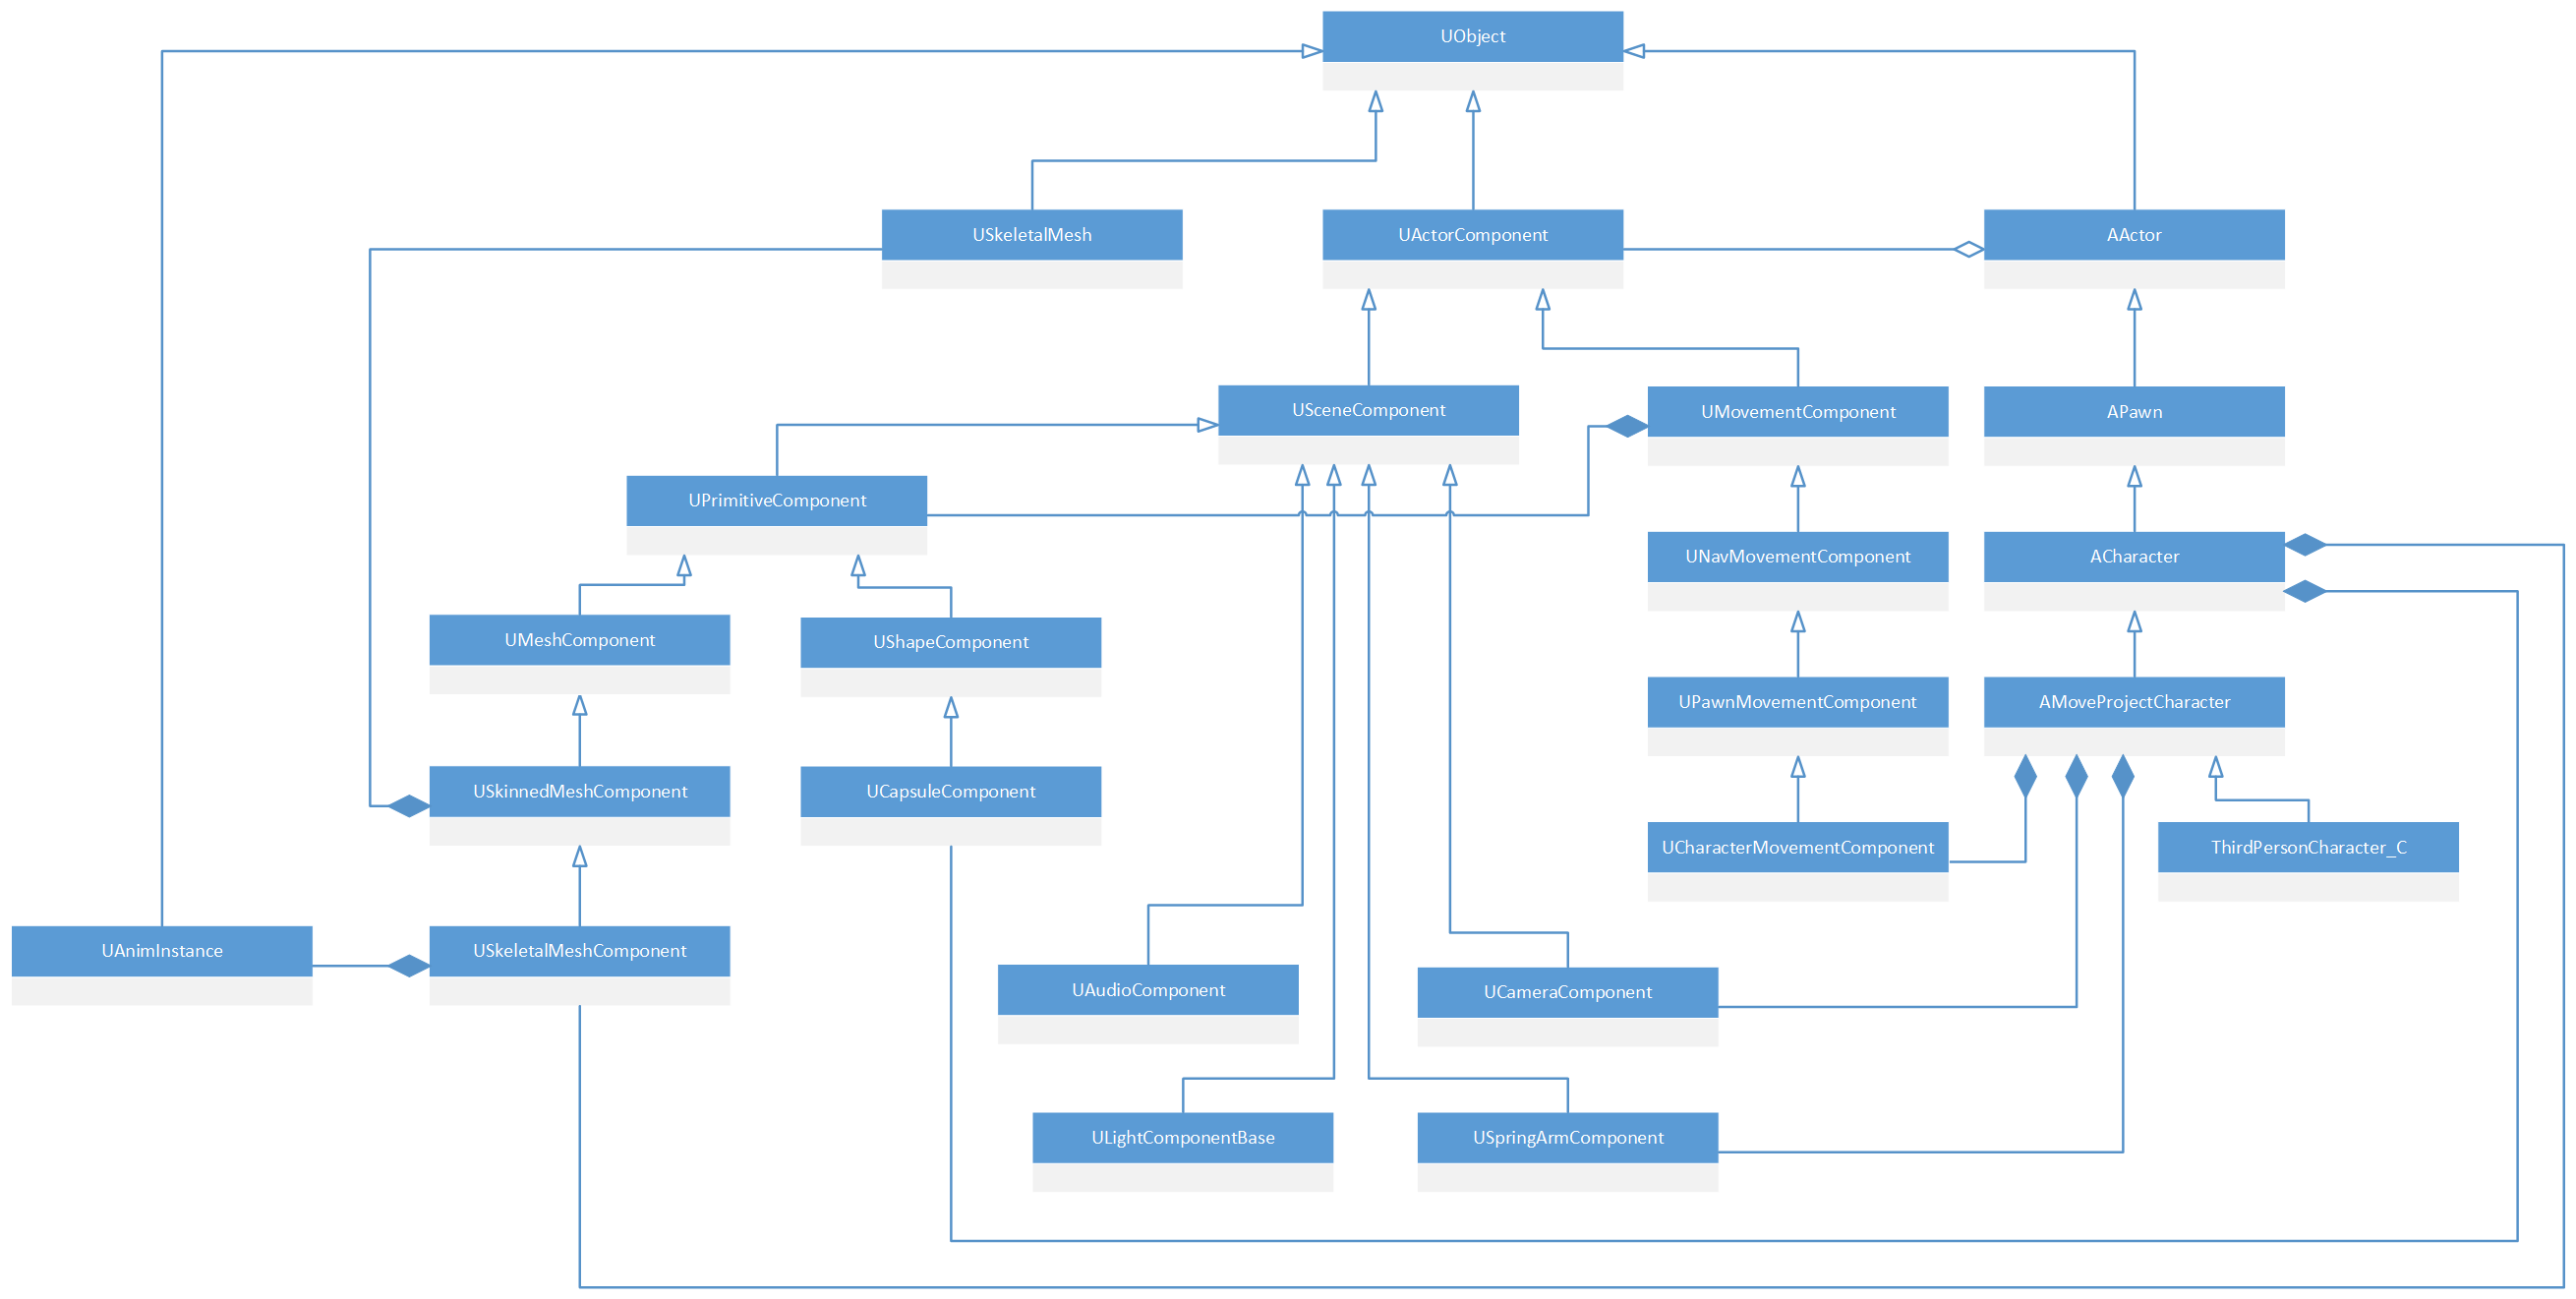
As we can see everything inherits from UObject, which is the base class in UE4. But more importantly we can notice 5 main inheriting groups:
- Actor/Pawn/Character
- MovementComponent
- CapsuleComponent
- MeshComponent
- AnimInstance
Actor/Pawn/Character
Any actor that can be possessed by players or AI inherits from Pawn. They are the physical representations of players and creatures in a level.
Character are pawns with a mesh, collision, and some basic movement logic.
They are responsible for all physical interaction between the player or AI and the world, and also implement basic networking and input models.
They are designed for a vertically-oriented player representation that can walk, jump, fly, and swim through the world using CharacterMovementComponent.
MoveProjectCharacter is going to be the C++ class inheriting from Character that will specify a few more things like the way the camera is going to follow the character.
Finally ThirdPersonCharacter_C is the blueprint class inheriting from MoveProjectCharacter that will hold the different instances like the mesh, the collision capsule, etc.
MovementComponent
NavMovementComponent inherits from MovementComponent and adds AI pathfinding.
PawnMovementComponent is used by Pawn in order to move.
As stated before, the CharacterMovementComponent will take care of moving the associated vertically-oriented character owner. By default it supports: walking, falling, swimming, flying and networking with server-client correction and prediction. It is primarily affected by current Velocity and Acceleration which is updated each frame based on the input vector accumulated thus far.
This is the main class I edited in order to have the character move as I wanted:
- Face towards its Velocity.
- Tilt into its Acceleration.
- Damp its capsule collision when landing.
Face towards its Velocity.
Tilt into its Acceleration
- Keep there center of mass above there feet so they doesn't fall over.
- They have to tilt into acceleration so the previous condition will still be true in the next second
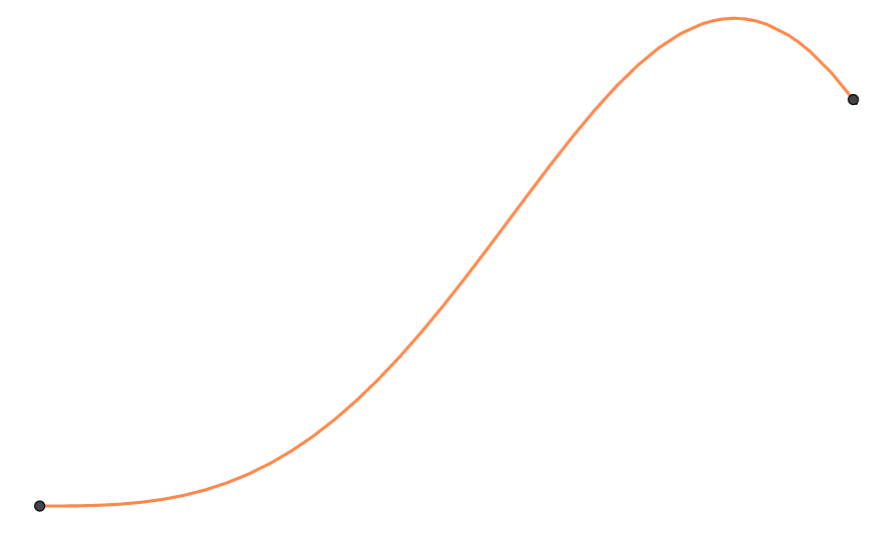
- The starting angle of tilting.
- The final angle of tilting.
- The duration to get from the starting angle to the final one.
- A factor influencing the shape of the curve.
Damp its capsule collision when landing.
- They are just like bouncing balls.
- They compress a little bit using squash and stretch.
- There's always a constant gravity, they are always accelerating downwards.
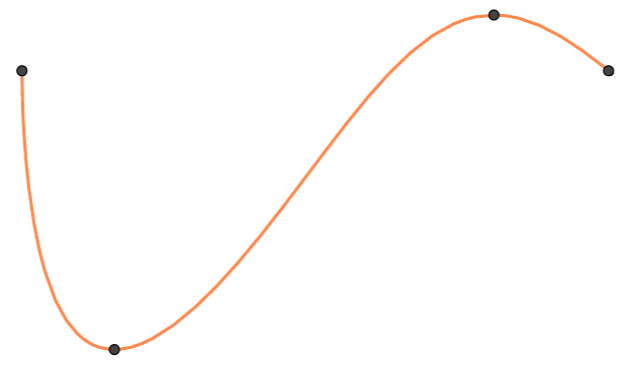
- The initial capsule height.
- The wanted capsule height the character will compress to. It is computed based on the character's falling speed.
- The percentage of capsule stretching. The capsule will stretch a bit before going back to the initial height so it keeps its momentum and doesn't stop directly which would look weird.
- The minimum capsule height under which the character dies.
CapsuleComponent
It inherits from the ShapeComponent which regroups different simple shapes like spheres, capsules, boxes, etc.
MeshComponent
Then we have SkinnedMeshComponent that supports bone skinned mesh rendering but doesn't support animation.
To overcome this we have SkeletalMeshComponent which creates an instance of an AnimInstance.
AnimInstance
In order to handle the blends with some specific curves and make the curves much simpler to edit, we need to do it in code, hence inherit from AnimInstance with MyAnimInstance and retarget the inheritance of ThirdPerson_AnimBP to the new class.
Links used
-
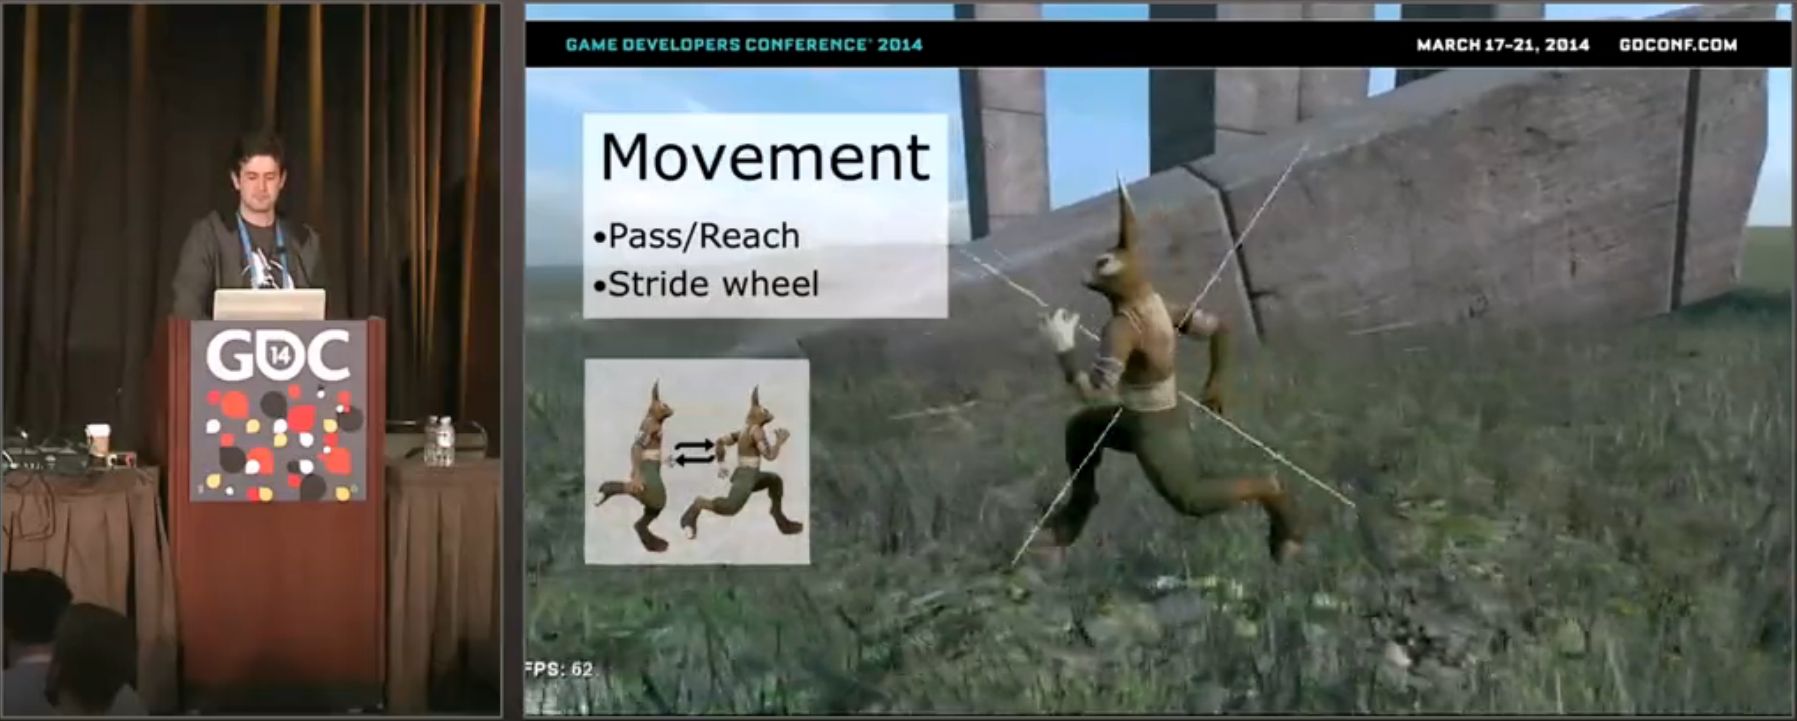
GDC14 Animation Bootcamp - An Indie Approach to Procedural Animation
Overgrowth's Run Animation using only two keyframes 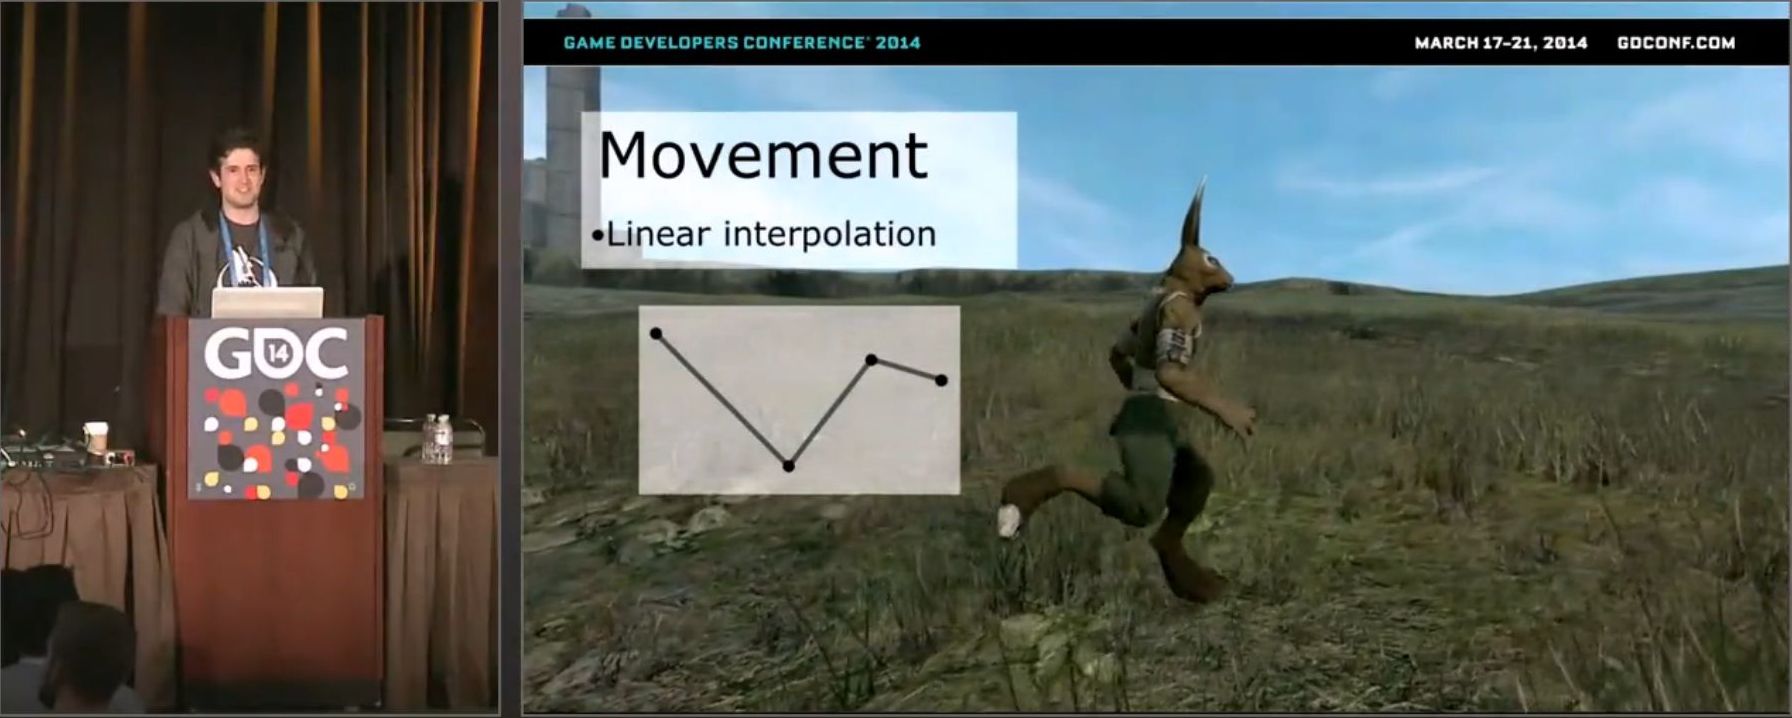
Overgrowth's Run Animation using linear interpolation to transition from one frame to the other 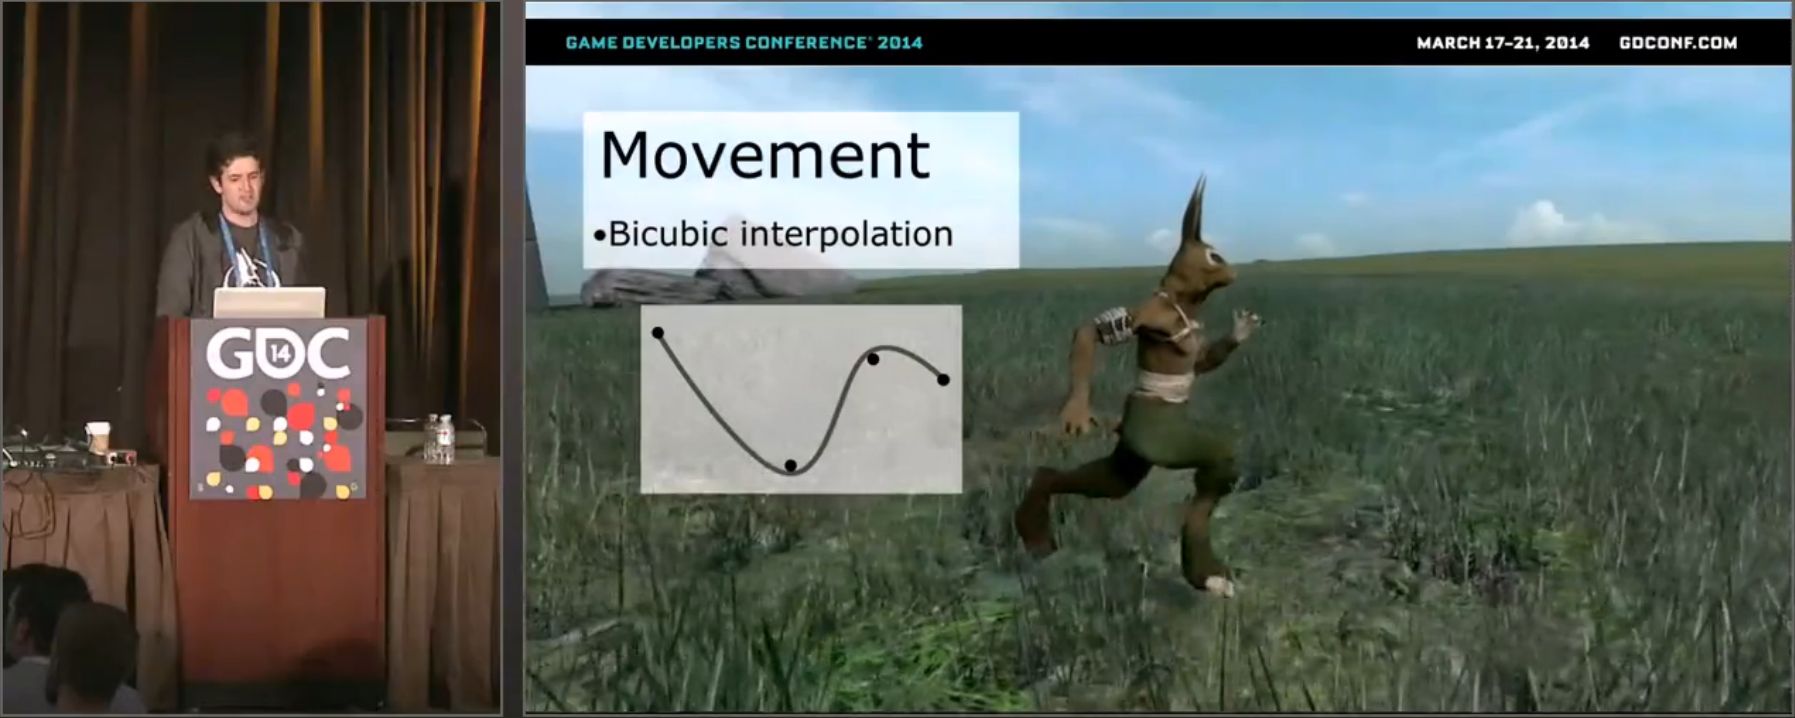
Overgrowth's Run Animation using bicubic interpolation to transition from one frame to the other - This video presents the different steps to work on procedural animations according to Wolfire Games: Youtube 2009 - Procedural Animation For Overgrowth - Wolfire Games
Other Links
- Unity walk foots adapting to the ground: GDC09 - Dynamic Walking with Semi-Procedural Animation
- GDC10 - Animation Warping for Responsiveness in FIFA Soccer
- Center of mass + IK + adjusting: GDC15 - Grounding Wildlife in the Mountains of Far Cry 4
- Maths behind inverse kinematics: GDC15 - Math for Game Programmers - Inverse Kinematics Revisited
- Procedural Idle Turning: GDC15 - UFC Animation
- GDC16 - IK Rig - Moving Forward
- Predictive foot ik approach: GDC16 - Fitting the World - A biomechanical approach to foot ik
- Siggraph07 - SIMBICON: Simple Biped Locomotion Control
- Nucl.AI 2016 - Bringing a hero from Parangon to life
- Procedural animation using Neural Networks for AI to find the best motion to go over a destination: Siggraph 1993 - Sensor Actuator Networks
- Control solutions that are reusable and can be parameterized: Eurographics 1994 - Synthesizing Parameterized Motions
- TED 2003 - Animate Characters by Evolving them
- GDC07 - How To Animate a Character You've Never Seen Before
- Siggraph07 - Parametric Motion Graphs
- AIGameDev08 - NaturalMotion’s euphoria Technology: The Honeymoon is Over
- GDC10 - Physics Meets Animation - Character Stunts in Just Cause 2
- GDC11 - CRYSIS 2 - Getting More Interactivity out of Animation-Data
- GDC11 - Implementation and Application of the Real-Time Procedural Helper-Joint System
- Animations and interractions with the environment: GDC15 - In Your Hands - The Character of Watch Dogs
- Automation Pipeline: GDC15 - Technical Artist Bootcamp - Proceduralism and Automation at Certain Affinity
- Procedural animation for tentacle creatures AI: GDC16 - Animation Bootcamp - 'Rainworld' Animation Process
- Quadruped procedural animations forward motion/turning/transitions: GDC16 - Animating Quadruped Characters in The 'Flame in The Flood'
- GDC16 - Animating an agent of Mayhem